1. Access the Contact
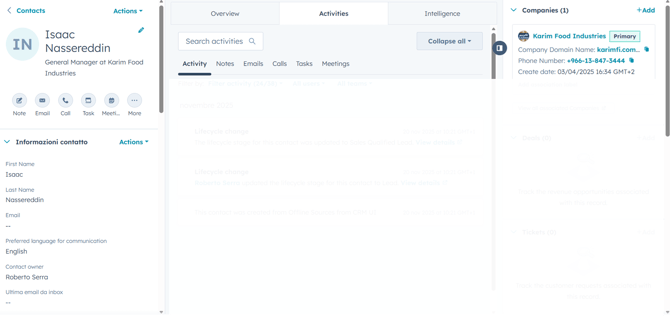
Make sure you are logged into your HubSpot account.
Go to the contact record of the person who will receive the samples.
2. Create a Task
Inside the contact’s page, open Tasks by clicking the icon under the contact’s name, or by selecting the Activities tab and then Tasks.
Click Create task. A window will appear where you can create and customize the task.
3. Write a Clear Title
In the Title field, enter a sentence that clearly describes the purpose of the task.
Suggested format:
“Packaging samples to [recipient name]”
Example: “Packaging samples to Isaac Nassereddin”.
This helps everyone immediately understand what the task refers to.
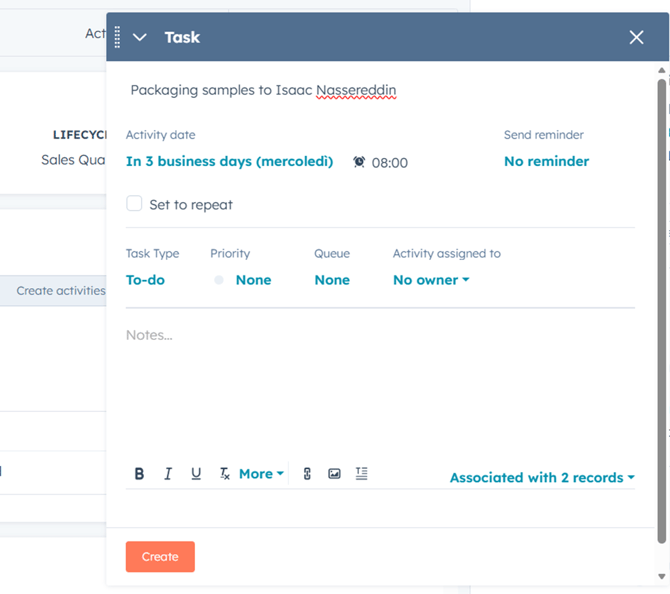
4. Set the Due Date and Other Fields
In the task window, locate the date section.
Select the date by which the task should be completed.
You may fill in any additional fields such as priority, type, or notes, if needed.
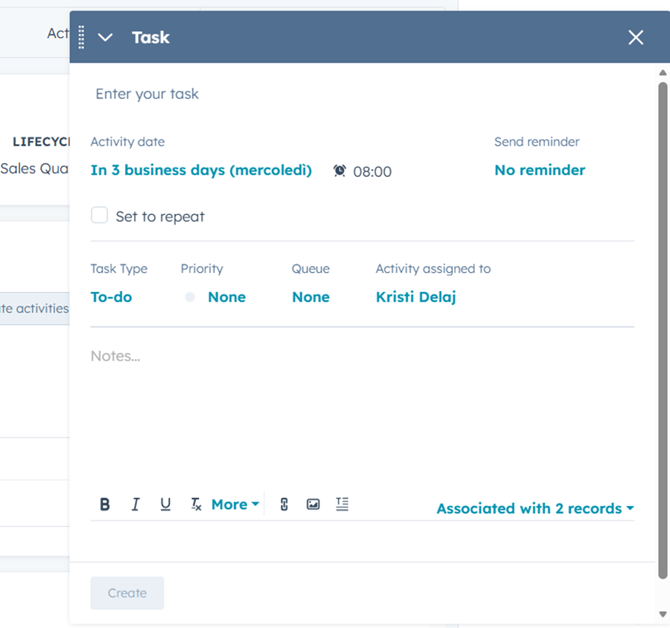
5. Assign the Task to the Correct Person
Find the Activity Assigned to section.
Open the dropdown menu and select the colleague responsible for preparing the sample shipment (for sample shipments: Kristi Delaj).
It is essential to assign the task to the correct person.
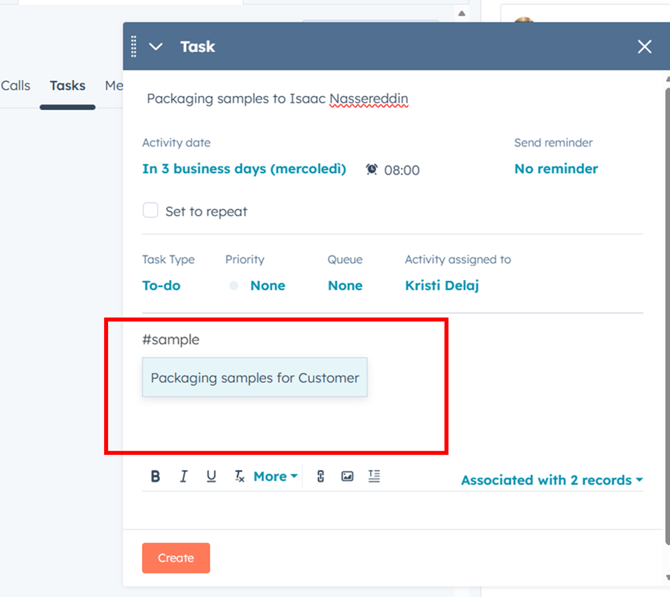
6. Insert the Template Using the Shortcut
Inside the main text box (usually called Notes), type:
#sample
This shortcut prompts HubSpot to show templates related to packaging sample requests.
After typing #sample, a small menu will appear.
Select the template called “Packaging samples for Customers”.
HubSpot will automatically insert the prepared template text into the task.
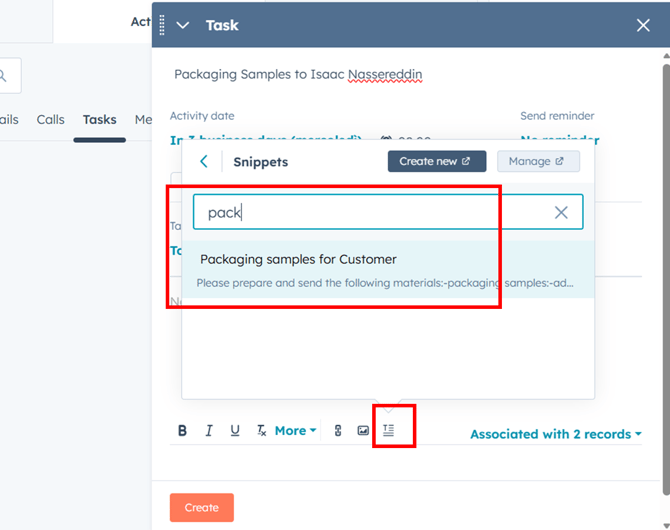
7. Insert the Template Manually (If the Shortcut Does Not Work)
If for any reason the #sample shortcut does not work, you can manually insert the snippet:
-
At the bottom of the task window, click the small document icon.
-
A search window will appear. Type keywords such as “Packaging samples for Customers”.
-
HubSpot will display the saved snippet.
-
Click on it to insert it into your task.
8. Review and Customize the Template
Once the template appears in the task, read it carefully and update any details that must be customized, such as:
-
recipient name
-
type of samples
-
quantity
-
shipping address (if needed)
-
any additional instructions
Ensure that the information is correct so the shipment can be prepared without confusion.
Note: The pre-filled address fields come from the contact record in HubSpot. If samples must be sent to a different address, remember to update the fields.

9. Save the Task
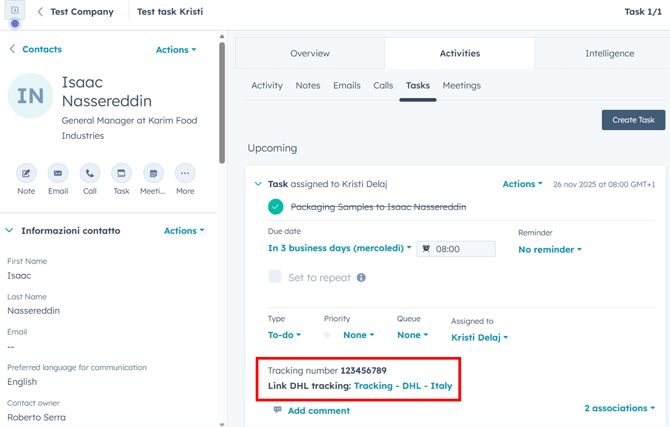
When everything is correct, click Save or Create task.
Your request is now officially recorded in HubSpot and assigned to the appropriate colleague.
Once the task is completed, you will receive an email notification.
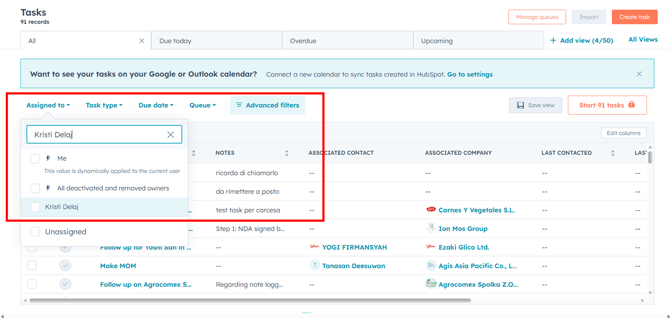
10. Check the Task Status
To check progress, go to the Tasks section, select Assigned to, and enter the name of the person who received the task.
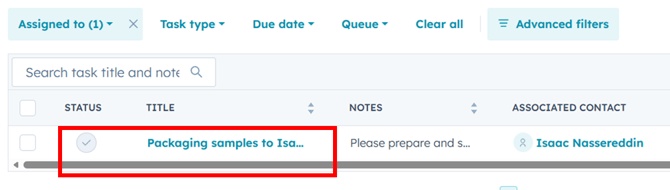
When the task appears, click on it.
You will be redirected to the contact’s page, where you will find updated information, including the completed task and the tracking number.